This article is currently in the process of being translated into Indonesian (~31% done).
Your first website
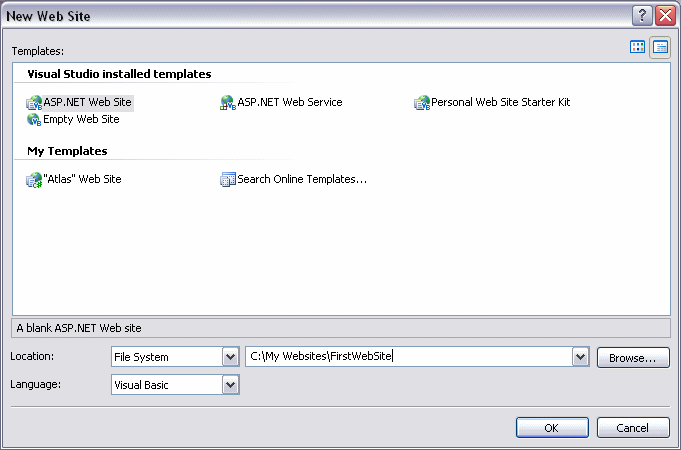
Dengan terinstalnya MS Visual Studio, kita telah siap untuk membuat situs ASP.NET kita yang pertama. Di VS, ini sangat mudah dilakukan. Buka menu File dan pilih "New Web Site". Tampilan dialog berikut ini akan tampil.

You need to select "ASP.NET Web Site", if it's not already selected. You should also name your new site. This is done by entering a name in the Location box. This text box is probably already filled for you, with the last part being something like "Website1". You can choose to accept this, as well as the location of the project, or you can enter a new one, like I did. I have created a folder, "My Websites", and within this folder, I would like to create the new project with the name of "FirstWebSite". For now, this is less important, but later on you might wish to gather all your projects in a specific folder.
Tutorial ini akan menggunakan bahasa pemrograman C#. Anda tidak diharuskan mahir pemrograman C#, jika anda sudah mengetahui tentang bahasa pemrograman .NET yang lain maka anda akan dapat belajar beberapa mengenai bahasa pemrograman C# pada tutorial ini. Pilih C# pada pilihan Language. Lanjutkan dengan menekan tombol Ok untuk membuat website baru.
VS will create a very basic website for you, consisting only of a Default.aspx file (and it's partner, the Default.aspx.cs file) and an App_Data folder. I will explain this later, but for now, just accept the fact that they are there. We will only use the Default.aspx for this first example. Move on to the next chapter, for the obligatory "Hello, world!" example.